

I’ll be honest, automated testing with Selenium hasn’t been a walk in the park for me. Like many QA engineers, I’ve spent countless hours writing automation scripts that run flawlessly on my local machine, only to watch them fail unexpectedly in CI. It’s a frustrating cycle that not only drains time but also loses confidence in the test automation suite.
For me, the real challenge wasn’t about getting some tests to work. It was about escaping the infinite debugging cycle and building confidence in production releases, reducing maintenance overheads. I realized the true goal is to build a complete framework that is not only robust but scalable and maintainable.
In this article, we will cover the advanced techniques and the best practices to improve your test scripts for enterprise use. You'll follow along with a demo app in a Python environment. Let's get started!
Setting Up Our Demo App for Real-World Testing
Before we dive into the main content of this blog, let’s first set up our demo app for real-world test scenario
Clone and set up the demo app:
git clone https://github.com/tarunsinghofficial/selenium-test-bp.git
cd selenium-test-bp
Next activate the virtual environments in Python:
# windows
python -m venv .venv
.\.venv\Scripts\Activate.ps1

# macOS/Linux
python3 -m venv .venv
source .venv/bin/activate
Ensure dependencies are installed:
pip install -r requirements.txtKeep the demo app always running (it will help you in the future course of this blog):
python serve_app.pyFinally, your page will be live at https://qa.tech, displaying a login form with valid credentials.
Test Scenario:
- Enter the username and password as: admin and admin123, respectively
- Verify that you’re redirected to the https://qa.tech/dashboard page
The login page is as below:

Login Page of the Demo App
And here’s the dashboard page:
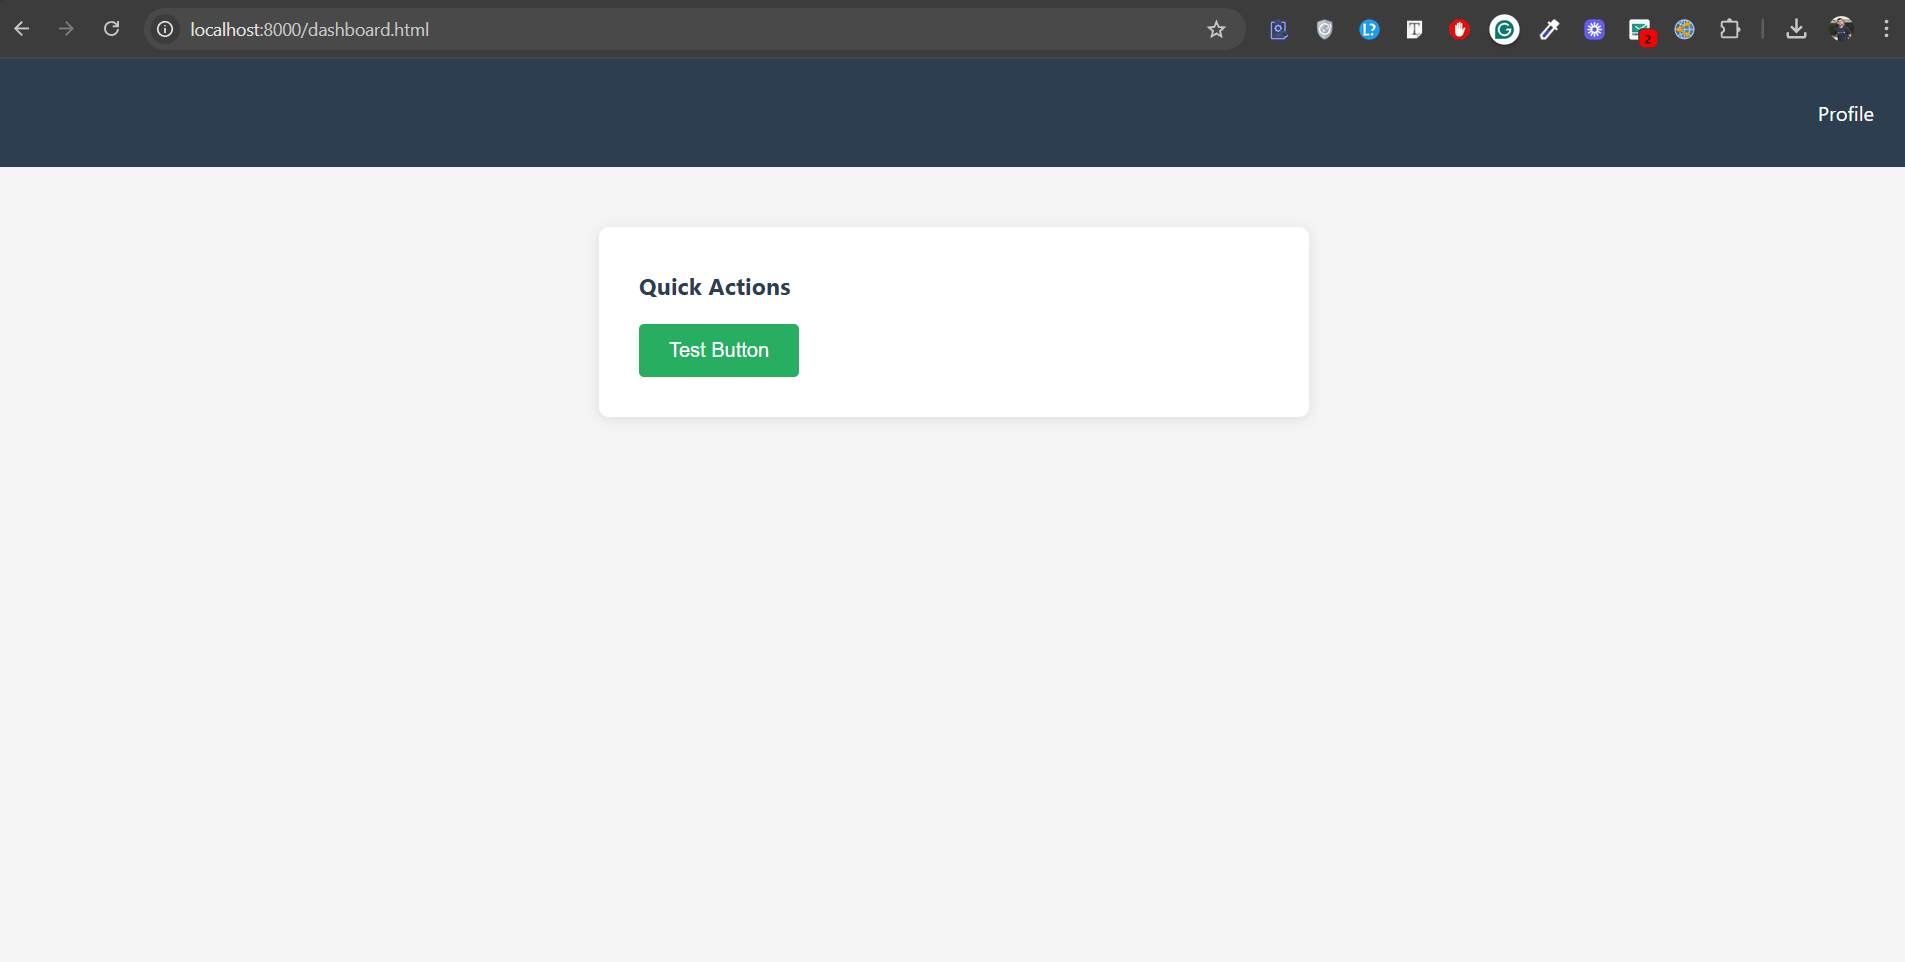
Dashboard Page of the Demo App
Up to this point, you have successfully set up the demo app. Make sure the app is still running, as we will be referencing it throughout the examples in this blog.
Building an Advanced Framework Design & Architecture
Writing basic scripts for testing the application in Selenium doesn’t guarantee all tests will be done correctly. There must be a well-designed test automation framework utilizing reusable and maintainable code scripts to ensure stable and scalable testing.
Advanced page object model (POM) for maintainability
Page Object Model is a design pattern in test automation frameworks like Selenium that creates an object class for each web page your tests interact with. In basic POM, there is a separation between the UI code and the test logic. But in advanced POM, this is taken to the next level, focusing on componentization and reusability.
Let’s take a look at how the standard POM design pattern is differentiated from the Page factory pattern.
- Standard POM: In a standard POM, you use the locators to identify and map elements in a page class. You can also initialize elements in the constructor. These are used to provide more control and clarity over what’s happening.
Refer to tests/pages/login_page.py
Code:
#tests/pages/login_page.py
class LoginPage:
    URL = "/home.html"  # Page Object maps a page's URL

    def __init__(self, driver, base_url="https://qa.tech"):
        self.driver = driver
        self.base_url = base_url
        # Standard POM: keep locators centralized in the page class
        self.username = (By.ID, "username")
        self.password = (By.ID, "password")
        self.login_btn = (By.ID, "loginBtn")
        self.error = (By.ID, "error")

    def load(self):
        # Navigation lives inside the page object
        self.driver.get(self.base_url + self.URL)
...- Page Factory: A page factory approach is also a design pattern for creating Page Objects simpler. It uses
@FindByannotations (Java) /@find_by(Python) or class-level encapsulation for lazy initialization. - From the two approaches discussed above, the more advanced and a recommended technique is the Component-Based architecture. Let’s see that:
- Component-Based: Think of this as a navbar, cards, etc., which are reusable components. Instead of rewriting code for these components, we abstract their behavior and locators into separate classes. This makes your framework more modular and maintainable. See the below example code for more details.
Refer to tests/components/navbar.py in the directory
Code:
# tests/components/navbar.py
class NavBar:
    # A reusable UI component (visible across multiple pages)
    def __init__(self, driver):
        self.driver = driver
        self.profile = (By.ID, "profile")

    def go_to_profile(self):
        WebDriverWait(self.driver, 5).until(EC.element_to_be_clickable(self.profile))
        self.driver.find_element(*self.profile).click()
Above we have defined a reusable UI component. By composing these type of component within your page objects in the tests/test_login.py file, you can build a more robust and scalable framework.
To integrate Navbar component to your tests, just import the navbar component, and add it in the tests/test_login.py file as:
# tests/test_login.py
import pytest
from tests.pages.login_page import LoginPage
from tests.pages.dashboard_page import DashboardPage
from tests.components.navbar import NavBar

@pytest.mark.parametrize("username,password,should_pass", [
    ("admin", "admin123", True),
    ("wrong", "wrongpass", False),
])
def test_login_flow(driver, username, password, should_pass):
    base = "https://qa.tech"
    login = LoginPage(driver, base)
    login.load()
    # Data-driven: inject test data directly
    login.login(username, password)

    if should_pass:
        dash = DashboardPage(driver, base)
        assert dashboard_page.is_loaded(), "Dashboard should be visible for valid credentials"
        dash.click_action()

        # Compose NavBar component with DashboardPage
        navbar = NavBar(driver)
        navbar.go_to_profile()  # Use the component

        # Verify navigation worked
        assert "profile" in driver.current_url
    else:
        assert "Invalid credentials" in login.get_error_text(), "Should show invalid message"
Data-Driven Page Objects
There are cases when you need to test any component or page of an application against some data. In that case, you can directly inject the data into the page functions themselves instead of hardcoding, which makes it more flexible. Here’s an example using pytest.mark.parametrize:
Refer to tests/test_login.py
Code:
# tests/test_login.py
@pytest.mark.parametrize("username,password,should_pass", [
    ("admin", "admin123", True),
    ("wrong", "wrongpass", False),
])
def test_login_flow(driver, username, password, should_pass):
    base = "https://qa.tech"
    login = LoginPage(driver, base)
    login.load()
    # Data-driven: inject test data directly
    login.login(username, password)

    if should_pass:
        dash = DashboardPage(driver, base)
        assert dash.is_loaded(), "Dashboard should be visible for valid credentials"
        dash.click_action()
    else:
        assert "Invalid credentials" in login.get_error_text(), "Should show invalid message"
Using Design Patterns to Write Better Tests
Design patterns are reusable code solutions, not just for developers but for test engineers too. There are many design patterns, including Singleton, Page Object Model (POM), Fluent Page Object Model, Factory pattern, and Facade design pattern. To write better tests, you can use patterns like:
Factory Pattern for WebDriver
The factory pattern provides you with a way to create a WebDriver instance in a single and controlled way, instead of making one instance of every test, which is important while working and managing different web browsers. Selenium provides flexibility to select browsers and create different WebDriver instances for different web browsers like Google Chrome, Safari, Firefox, etc., based on configuration.
Builder Pattern for Test Data
Test data can get complicated. Imagine you’re testing a user registration form with 25 fields. Creating a new user form object for every test case becomes complex and tedious. Builder pattern allows you to build complex test data objects step-by-step. You begin with a simple UserBuilder and use chain methods to set only the necessary fields, leaving the rest of the fields set to appropriate defaults.
Mastering the Art of Stable Tests
Waiting the Right Way
You may have ever come into a situation where you have added a sleep statement using time.sleep() (for Python) or Thread.sleep() (for Java), but that’s a brute-force approach, as the code cannot itself determine how long it needs to wait. You’re telling the test to blindly wait for a set amount of time, whether the element is ready or not. This is a surefire way to introduce test flakiness. Let’s see why:
Example:
# Bad practice: fixed sleep implementation creates flakiness

time.sleep(3)
driver.find_element(By.ID, "loginBtn").click()
The above code might work on a fast machine, but it will fail on a slow CI server or with a network lag. So, instead, we use waits provided by Selenium that are smart and efficient about timing.
- Implicit Waits: Selenium has a built-in way to set a global timeout for the entire session. If an element isn’t immediately found, the driver will wait for the duration of the timeout before throwing a
NoSuchElementExceptionerror. The default value is 0, which is great, but can still lead to long waits. See an example of implementing implicit wait:
Example:
# Set once after creating driver (good for very stable UIs)

driver.implicitly_wait(10) # seconds- Explicit Waits: An explicit wait tells Selenium to wait for a specific condition to be met before proceeding, and if it is not met, the code sends a timeout error. A
WebDriverWaitinstance and anexpected_conditionsmodule are used to define what we’re waiting for. Our LoginPage and DashboardPage classes already implement this.
Refer to tests/pages/login_page.py
Code:
# tests/pages/login_page.py
def login(self, username, password, timeout=8):
        # Using explicit wait to ensure stability
        WebDriverWait(self.driver, timeout).until(EC.presence_of_element_located(self.username))
        self.driver.find_element(*self.username).clear()
        self.driver.find_element(*self.username).send_keys(username)
        self.driver.find_element(*self.password).clear()
        self.driver.find_element(*self.password).send_keys(password)
        self.driver.find_element(*self.login_btn).click()

    def get_error_text(self, timeout=2):
        try:
	    # Using explicit wait to ensure stability
            WebDriverWait(self.driver, timeout).until(EC.visibility_of_element_located(self.error))
            return self.driver.find_element(*self.error).text
        except:
return ""- Fluent Waits: Another extension of explicit waits, but with a more advanced form is fluent waits, allowing you to define not only the timeout but also the polling interval and which exceptions to ignore during the wait.
Choosing the Right Locators
Simple locators work fine, and they are reliable if they are unique and stable. For example, the find_btn_element(By.ID, "btnClick") works fine until your frontend team refactors the HTML.
Best Practices for Locators
Here’s a hierarchy of locators based on reliability:
- Test-specific attributes (most reliable)
Work with the developer team to ensure custom attributes like data-testid or data-test are added to key UI elements. For example:
driver.find_element(By.CSS_SELECTOR, '[data-testid="login-button"]')- Semantic HTML and ARIA labels
Try to add semantic HTML and ARIA labels to UI elements. A good example is:
driver.find_element(By.CSS_SELECTOR, "button[aria-label='Login button']")- Stable CSS classes
These can be powerful but fragile. An example would be:
driver.find_element(By.CSS_SELECTOR, ".product-actions__add-to-cart")- XPath based on text content
Always use a relative instead of an absolute path, which is based on text content. An example would be:
driver.find_element(By.XPATH, "//button[contains(text(), 'Login Button')]")Advanced Techniques for Scalability & Efficiency
Parallel Execution with Selenium Grid
Running test cases one by one is a time-consuming process. Instead, run them in parallel using Selenium grid to reduce the overall test suite execution time.
Selenium Grid allows you to run tests in parallel, across different web browsers and machines (also called Nodes), all from a central point.
But why use Grid? The answer to this is underlying when you have to run a large number of test cases within a short duration. Let’s understand this with an example.
Assume you have 150 test cases to run, and when testing in the Google Chrome browser, each test case takes 60 seconds to run (1 min). Now, when these tests are run one by one, it will take 150 mins or 2.5 hours. But what if there are 10 machines (Nodes) running in parallel, each with 15 test cases, then it could potentially get that down to just a few minutes.
Let’s see a code example for better understanding:
Create a file called grid_driver_factory.py in the directory tests/utils and add the following code:
Code:
# tests/utils/grid_driver_factory.py
from selenium import webdriver
from selenium.webdriver.chrome.options import Options as ChromeOptions
from selenium.webdriver.firefox.options import Options as FirefoxOptions
from selenium.webdriver.chrome.service import Service as ChromeService
from selenium.webdriver.firefox.service import Service as FirefoxService
from webdriver_manager.chrome import ChromeDriverManager
from webdriver_manager.firefox import GeckoDriverManager
import os

class GridDriverFactory:
 @staticmethod
    def get_driver(browser="chrome", use_grid=False, grid_url=None, headless=None):
        # env defaults
        if grid_url is None:
            grid_url = os.getenv("GRID_URL", "https://qa.tech")
        if headless is None:
            headless = os.getenv("HEADLESS", "1") == "1"

        if use_grid or os.getenv("USE_GRID", "0") == "1":
            return GridDriverFactory._get_grid_driver(browser, grid_url, headless)
        return GridDriverFactory._get_local_driver(browser, headless)

 @staticmethod
    def _get_local_driver(browser, headless):
        b = browser.lower()
        if b == "chrome":
            opts = ChromeOptions()
            if headless: opts.add_argument("--headless=new")
            opts.add_argument("--no-sandbox")
            opts.add_argument("--disable-dev-shm-usage")
            opts.add_argument("--window-size=1366,768")
            service = ChromeService(ChromeDriverManager().install())
            return webdriver.Chrome(service=service, options=opts)

        if b == "firefox":
            opts = FirefoxOptions()
            if headless: opts.add_argument("--headless")
            opts.add_argument("--width=1366")
            opts.add_argument("--height=768")
            service = FirefoxService(GeckoDriverManager().install())
            return webdriver.Firefox(service=service, options=opts)

        raise ValueError(f"Unsupported browser: {browser}")

 @staticmethod
    def _get_grid_driver(browser, grid_url, headless):
        b = browser.lower()
        if b == "chrome":
            opts = ChromeOptions()
            if headless: opts.add_argument("--headless=new")
            opts.add_argument("--no-sandbox")
            opts.add_argument("--disable-dev-shm-usage")
            opts.add_argument("--window-size=1366,768")
            return webdriver.Remote(command_executor=f"{grid_url}", options=opts)

        if b == "firefox":
            opts = FirefoxOptions()
            if headless: opts.add_argument("--headless")
            opts.add_argument("--width=1366")
            opts.add_argument("--height=768")
            return webdriver.Remote(command_executor=f"{grid_url}", options=opts)

        raise ValueError(f"Unsupported browser: {browser}")
Running the Tests:
Now run these tests in parallel with Selenium Grid by executing the following commands:
Note: Make sure the app is still running. If not, run the below command:
python serve_app.py- Start Selenium Grid (standalone):
Open a new command prompt or terminal and run:
java -jar selenium-server-4.35.0.jar standaloneThis will run a Selenium Grid Hub along with a local node. You will also a see a message showing the hub has been started.
- Next, run test with environment variables:
$env:HEADLESS="1"; $env:USE_GRID="1"; $env:GRID_URL="https://qa.tech" pytest tests/test_cross_browser.py -v -sOr simply run the cross_browser_test.bat file (a batch file to run your cross-browser tests across browsers):
.\cross_browser_test.bat test-gridYou will see the output confirming tests has been passed successfully:
============================================================= test session starts ==============================================================
platform win32 -- Python 3.13.4, pytest-8.4.1, pluggy-1.6.0 -- C:\Users\tarun\Mern\literally\advanced-sel\.venv\Scripts\python.exe
cachedir: .pytest_cache
rootdir: C:\Users\tarun\Mern\literally\advanced-sel
configfile: pytest.ini
plugins: rerunfailures-15.1, xdist-3.8.0
collected 4 items

tests/test_cross_browser.py::TestCrossBrowser::test_login_across_browsers[chrome] CHROME - Login test passed
PASSED
tests/test_cross_browser.py::TestCrossBrowser::test_login_across_browsers[firefox] FIREFOX - Login test passed
PASSED
tests/test_cross_browser.py::TestCrossBrowser::test_invalid_login_across_browsers[chrome] CHROME - Invalid login test passed
PASSED
tests/test_cross_browser.py::TestCrossBrowser::test_invalid_login_across_browsers[firefox] FIREFOX - Invalid login test passed
PASSED

============================================================== 4 passed in 18.46s ==============================================================
Cross-Browser and Cross-Device Testing
Users are spread across different browsers. They are not just using Chrome or Firefox; they may be on Edge, Safari, or any other browser. How will you ensure your application works on each browser? A robust test suite validates the application behaviour across web browsers and devices.
Selenium Grid allows you to run the test suites across different browsers, different versions, devices, and operating systems, ensuring a stable and consistent user experience.
Create another file called test_cross_browser.py in the directory tests/ and add the following code:
Code:
# tests/test_cross_browser.py
import pytest
import os
from tests.pages.login_page import LoginPage
from tests.pages.dashboard_page import DashboardPage
from tests.utils.grid_driver_factory import GridDriverFactory

BROWSERS = ["chrome", "firefox"]

class TestCrossBrowser:
 @pytest.mark.parametrize("browser", BROWSERS)
    def test_login_across_browsers(self, browser):
        use_grid = os.getenv("USE_GRID", "0") == "1"
        grid_url = os.getenv("GRID_URL", "https://qa.tech")
        driver = GridDriverFactory.get_driver(browser=browser, use_grid=use_grid, grid_url=grid_url)

        try:
            login_page = LoginPage(driver)
            login_page.load()
            login_page.login("admin", "admin123")

            dashboard_page = DashboardPage(driver)
            assert dashboard_page.is_loaded(), f"Dashboard failed to load in {browser}"
            print(f"{browser.upper()} - Login test passed")
        finally:
            driver.quit()

 @pytest.mark.parametrize("browser", BROWSERS)
    def test_invalid_login_across_browsers(self, browser):
        use_grid = os.getenv("USE_GRID", "0") == "1"
        grid_url = os.getenv("GRID_URL", "https://qa.tech")
        driver = GridDriverFactory.get_driver(browser=browser, use_grid=use_grid, grid_url=grid_url)

        try:
            login_page = LoginPage(driver)
            login_page.load()
            login_page.login("wrong", "credentials")
            assert "Invalid" in login_page.get_error_text(), f"Error message not shown in {browser}"
            print(f"{browser.upper()} - Invalid login test passed")
        finally:
            driver.quit()
Now test the cross-browser implementation by simply running the cross_browser_test.bat command:
.\cross_browser_test.bat test-localYou will see the output confirming tests has been passed successfully:
Running cross browser tests locally (Chrome, Firefox).
Make sure demo app is running at https://qa.tech
============================================================= test session starts ==============================================================
platform win32 -- Python 3.13.4, pytest-8.4.1, pluggy-1.6.0 -- C:\Users\tarun\Mern\literally\advanced-sel\.venv\Scripts\python.exe
cachedir: .pytest_cache
rootdir: C:\Users\tarun\Mern\literally\advanced-sel
configfile: pytest.ini
plugins: rerunfailures-15.1, xdist-3.8.0
collected 4 items

tests/test_cross_browser.py::TestCrossBrowser::test_login_across_browsers[chrome]
DevTools listening on ws://127.0.0.1:61085/devtools/browser/8aaab54d-9f21-4b2a-9263-d34c1213b901
CHROME - Login test passed
PASSED
tests/test_cross_browser.py::TestCrossBrowser::test_login_across_browsers[firefox] FIREFOX - Login test passed
PASSED
tests/test_cross_browser.py::TestCrossBrowser::test_invalid_login_across_browsers[chrome]
DevTools listening on ws://127.0.0.1:61142/devtools/browser/88a28b62-77dd-44bf-a54e-4685ff0ae0b7
CHROME - Invalid login test passed
PASSED
tests/test_cross_browser.py::TestCrossBrowser::test_invalid_login_across_browsers[firefox] FIREFOX - Invalid login test passed
PASSED

============================================================== 4 passed in 39.26s ==============================================================
The code uses a data-driven approach with pytest and our GridDriverFactory to easily run tests on multiple browsers. We are currently testing for Google Chrome, Firefox, and you can easily integrate more browsers to it, like Microsoft Edge, Safari, etc.
Seamless CI/CD Integration
It's a huge pain when your tests pass locally but fail on the CI server. We've all been there, as it's a classic flakiness problem. But what if your testing environment were the same everywhere?
That's the magic of Docker. It packages everything your test needs, including your scripts, its dependencies, and even the browser, into a single, portable container. This makes sure your tests run perfectly, every single time. It's the key to truly reliable and consistent automation.
Wrapping It Up
Tired of endless debugging? We get it. Even with good practices in Selenium, tests that fail for no clear reason are frustrating. We've shown you how to build a rock-solid framework, but what if you could skip the manual script maintenance altogether?
This is where AI-powered testing comes in. It's a game-changer, automatically learning your product to create reliable tests.
Ready to ship with confidence and leave the debugging behind? Book a demo with QA.tech today and see the future of QA.